Paddy's Ardumower Arctic Hare

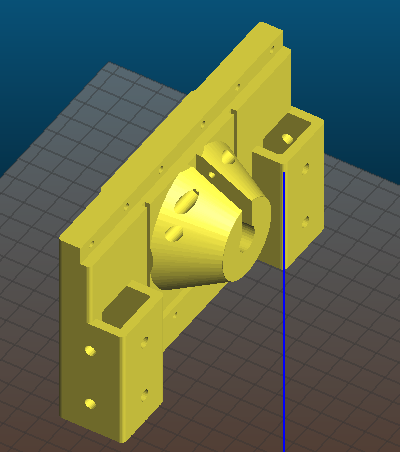
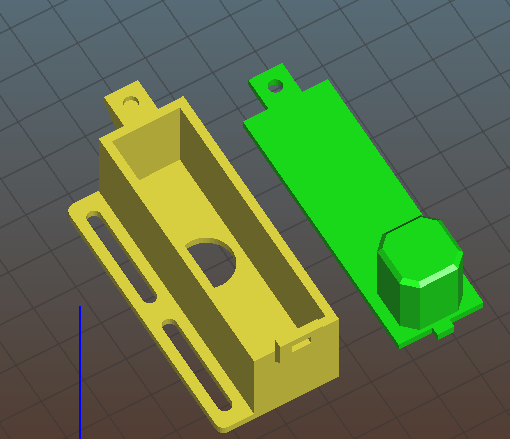
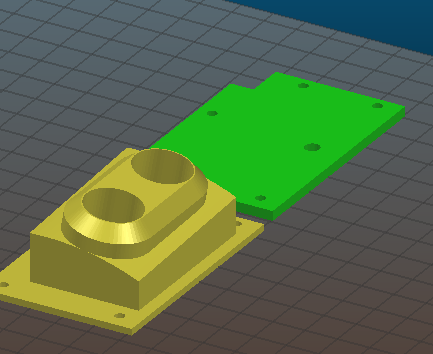
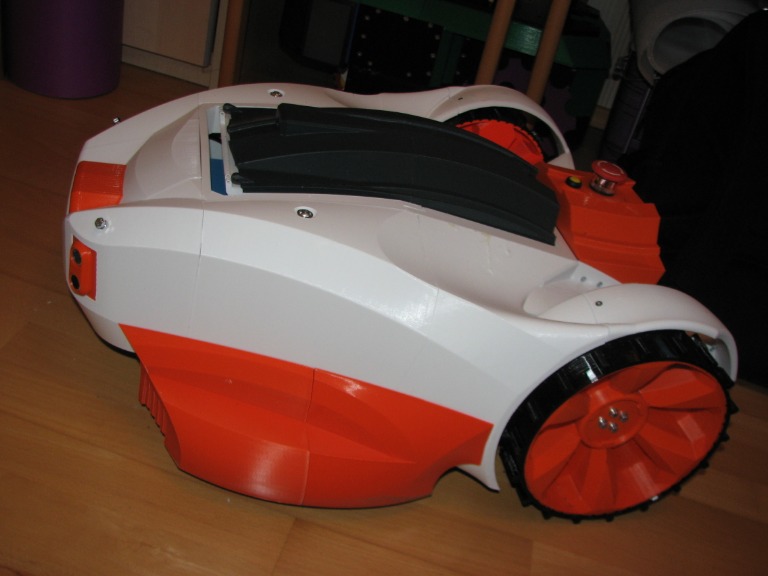
Noch ein paar Ergänzungen zu meinem aktuellen Stand. Ich versuche die Hall Sensoren über dem Stützrad unterzubringen. Dazu habe ich eine neue Platte für das Stützrad entworfen.
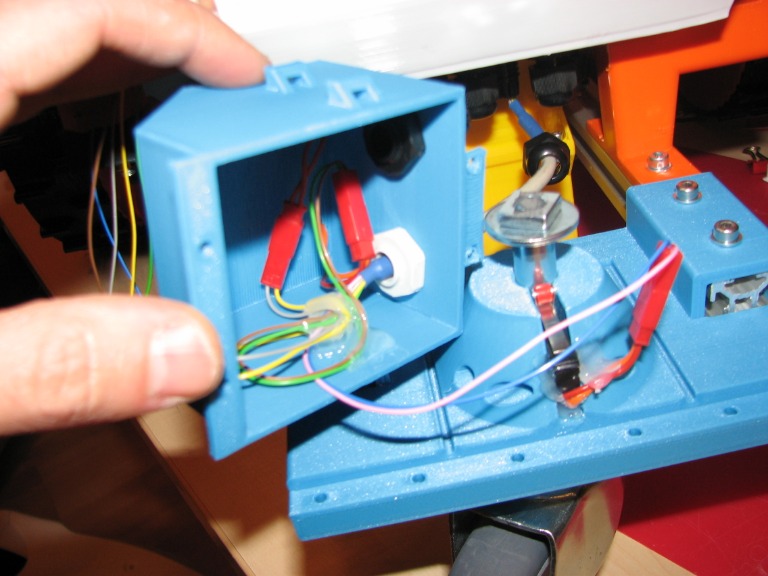
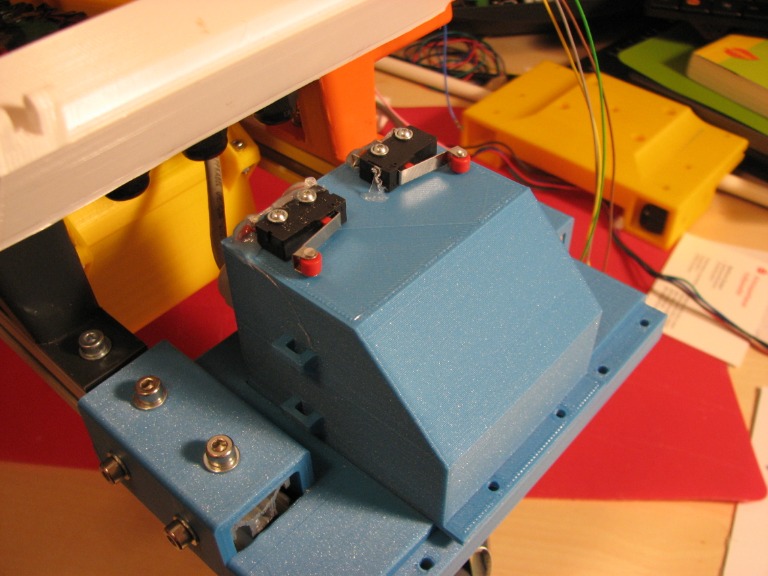
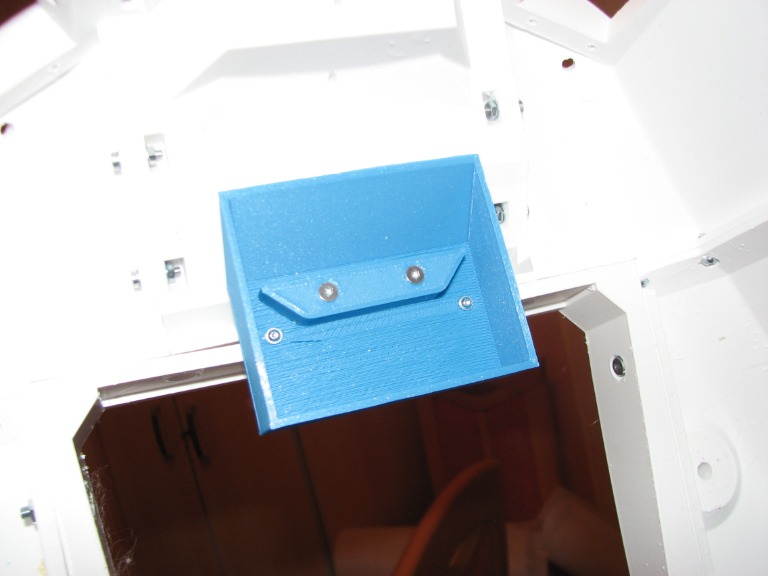
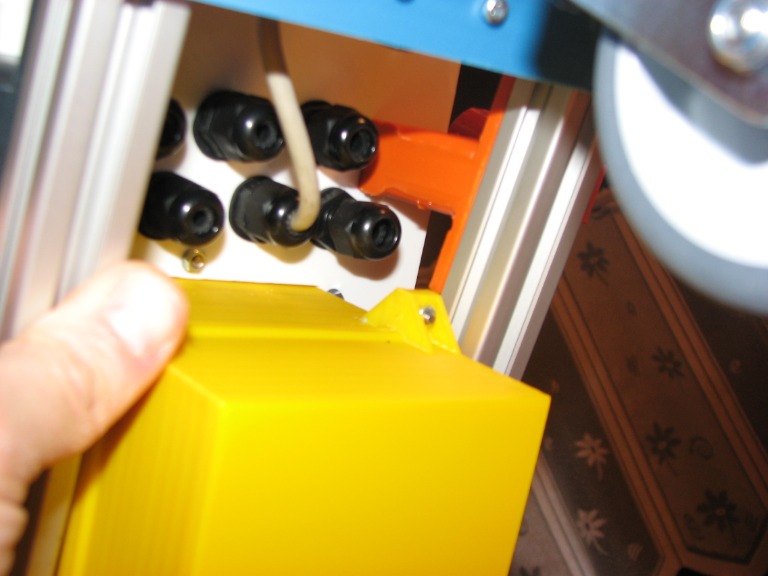
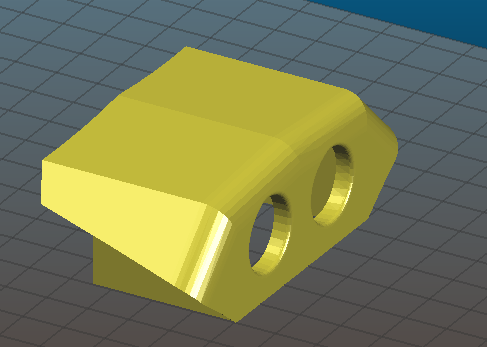
Die Hall Sensoren und der Anhebeschutz werden durch eine kleine Box geschützt. An den Seiten der Box sind Befestigungspunkte für Kabelbinder..
IMG_0018.JPG


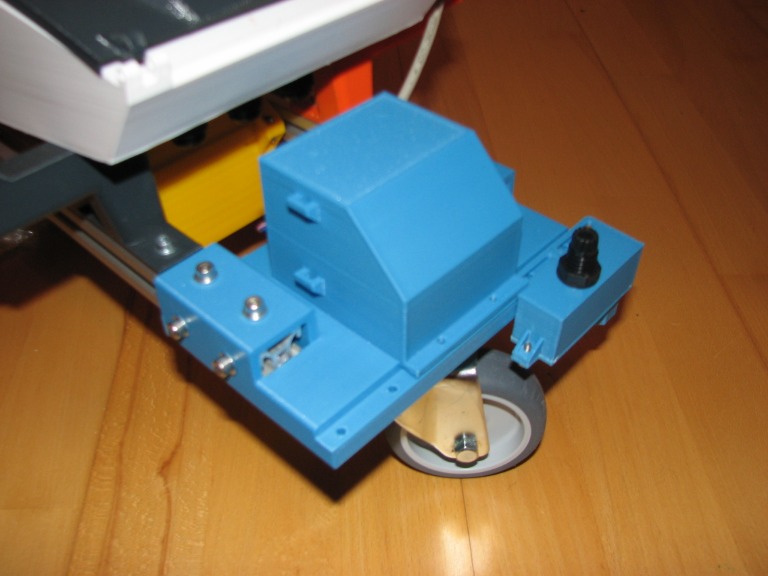
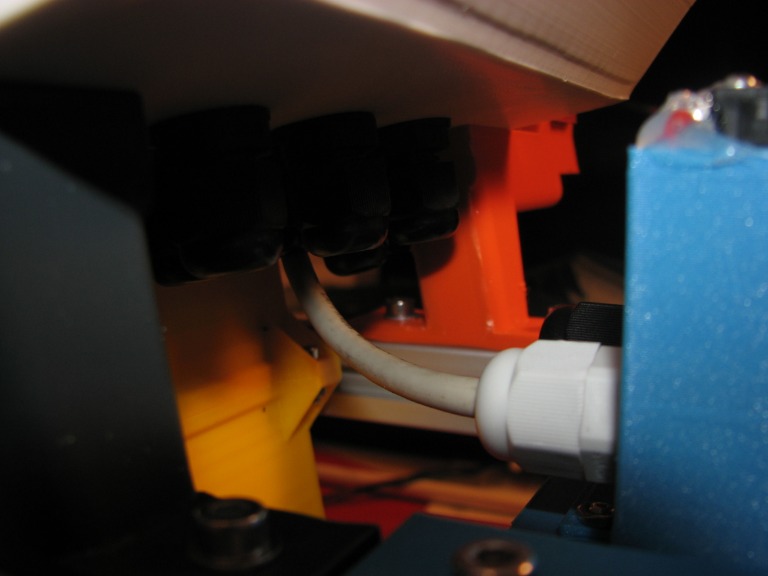
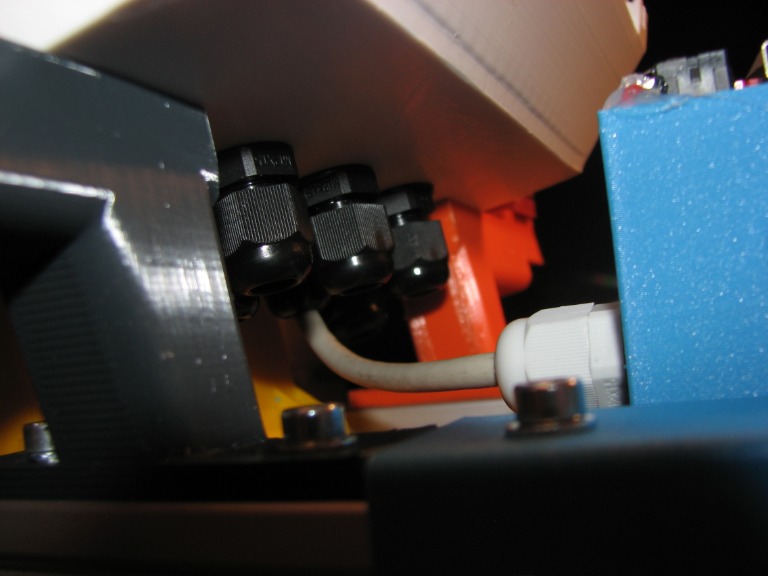
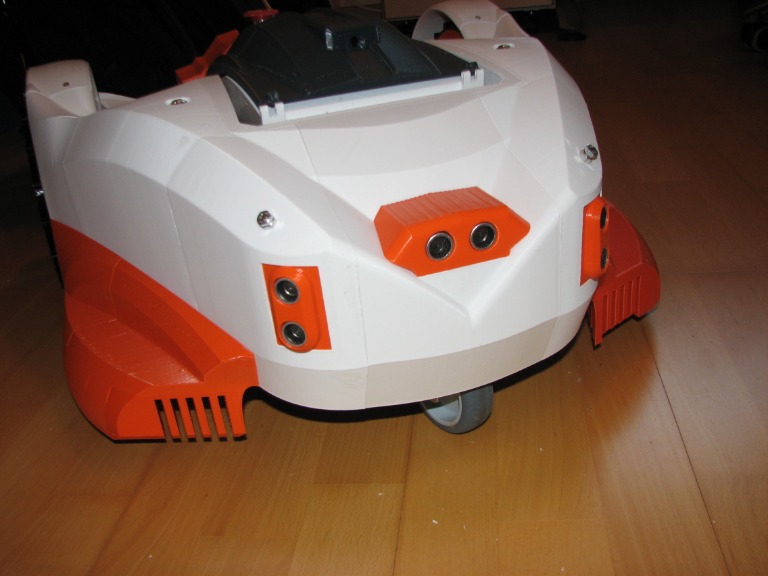
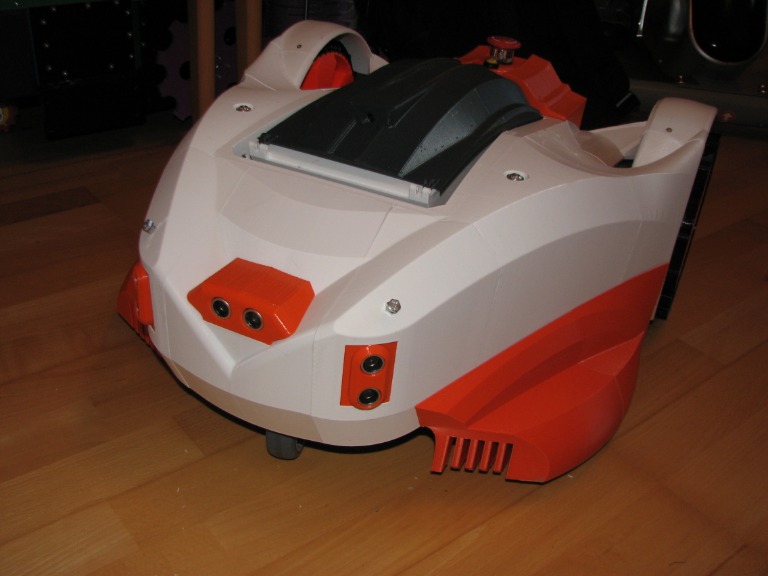
Da auch der Perimeter Empfänger untergebracht werden will, habe ich eine neue, kleine Box entworfen. Man kann sie frei verschieben und entsprechend dem verlegten Perimeter anpassen. In den äußeren Positionen stört der Empfänger aber beim Einbau von US Sensoren. Mittig platziert könnte es aber klappen. Problematisch ist der mangelnde Platz an der Nase. Es ist hier wirklich sehr eng.
IMG_0021.JPG


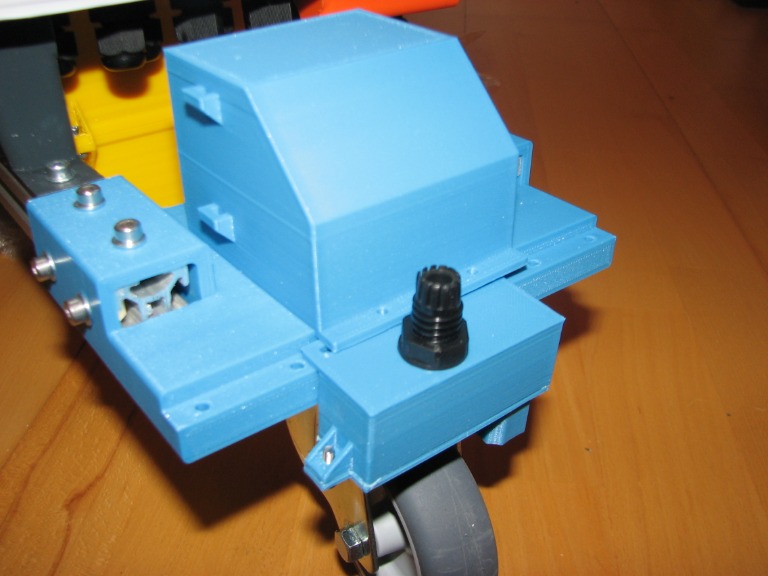
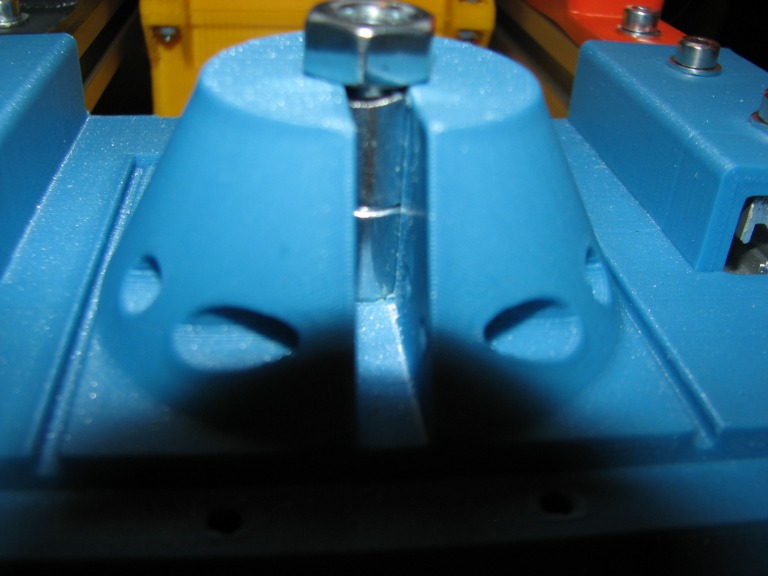
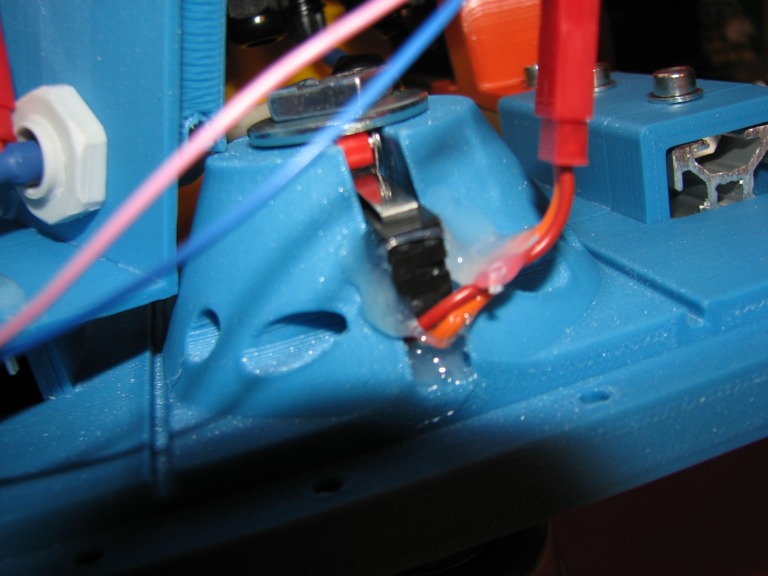
Außerdem soll ein Anhebeschutz mit integriert werden. Die Idee ist, dass das Stützrad über den eigenen Drehkranz frei drehen kann. Beim Anheben rutscht das Rad ein Stück nach unten raus und betätigt einen Taster. Das ganze funktioniert echt gut mit einer langen Schraube M8 und Hülsen mit 10mm Außendurchmesser. Leider habe ich mich beim Kürzen der Schraube vermessen, so dass es nicht ausfahren kann (zu kurz), also nochmal raus in die Garage und neue Schraube abschneiden. In den Schlitz wird dann der Taster eingebracht (Rollentaster Marquardt 1050 und vergleichbare)
IMG_0022.JPG


Bis ich hier eine zufriedenstellende Lösung habe werden wohl einige Drucke notwendig sein.
Attachment: https://forum.ardumower.de/data/media/kunena/attachments/2946/IMG_0022.JPG/
 
Zuletzt bearbeitet von einem Moderator:
Update for Hall sensor based Bumper
I was able to attach the Hall sensors on top of front bracket and made a short video about how it works.
In general, it works good but I get some false triggers, so my solution might not work as I expected. If bumper triggers even if noting gets hit, it is no solution for me.

I can decrease noise by setting potentiometers higher but this causes a higher force needed to trigger bumper.

Because summer is coming and I want to complete this build in next weeks. I will create a new version using simple micro switches.
Fusion files of this version can be found here https://a360.co/2EHSHHD
https://youtu.be/bsMqFnyoqnQ
 
Neuer Bumper: Der neue Bumper arbeitet mit einfachen Mikroschaltern wie dem Marquardt 1050 (Rollentaster). Insgesamt werden drei davon benötigt. Ein Taster wird in das neue Front Bracket eingelassen und dient zum Erkennen, ob der Mower noch auf dem Boden steht oder angehoben wurde. Über den Taster wird ein Cover gestülpt (front bracket cover), worauf zwei weitere Taster montiert werden. Dies sind die eigentlichen Bumper. Am Oberteil des Chassis wird das Teil switch_cover mittig festgeschraubt. Hieran ist das Teil Switch trigger festgeschraubt, welches die Taster betätigt. Insgesamt eine sehr einfache, aber wirklich gut arbeitende Lösung.

New Bumper: it uses three roller type switches like Marquardt 1050. One is placed into the new front bracket to detect lift of mower This switch gets covered with part "front bracket cover". Here additional two switches are placed and act as bumper. To trigger them, you need to place part "switch cover" to the upper cover part (placed in middle). Here you also attach "switch trigger" bar. If chassis moves, this trigger bar collids with switches and trigger them. This is a really simple but reliable solution.

IMG_0025.JPG

IMG_0024.JPG

IMG_0027.JPG

IMG_0034.JPG

IMG_0035.JPG


Ausrichtung auf Druckbett / Orientation on print surface
bumper_switch.png

front_bracket.png


Video https://youtu.be/dG6KslQtgmI Attachment: https://forum.ardumower.de/data/media/kunena/attachments/2946/bumper_switch.png/
 
Zuletzt bearbeitet von einem Moderator:
I've printed the new bumper box, but I'd like to start assembling it together with perimeter sensor and, maybe, even US sensors.
I noticed that you have perimeter sensor box in one of the images, but it is not yet available on the thingiverse. Can we get the STL for that one too ? :)
And what about US sensors? Still planning to get those installed?
 
Hi,

my mistake, I wanted to complete front bracket before my vacation last week and forget the small box. It is now available at Thingiverse too. It consists of a small box and a lid. The lid needs some support.

Ausrichtung auf dem Druckbett / orientation on print surface
Perimeter.png


Because of Sonar, it is still on work. Because lawn starts growing, I first try to get it up and running and will add sonar the next weeks. Currently, I build a new Mow motor box because I want to re-use my old Tianchen Mow motors. Hopefully they are strong enough to even drive a larger disc. I try to avoid buying new motors. This hobby is kind of expensive. My neighbours asked me several times if I can build some mowers for them too. They think I'm insane because I told them it will be less expensive to buy a commercial one ;-)
Attachment: https://forum.ardumower.de/data/media/kunena/attachments/2946/Perimeter.png/
 
Zuletzt bearbeitet von einem Moderator:
What are your plans regarding charging (station) for the mower?
On my previous version, I've used two metal plates on the top and two pieces of metal hanging from the top in the charging station. Not sure if this approach will be suitable with the 3d printed one.
 
Hi,

my last version was similar to yours and I will stick to it. Two metal plates (flexible like spring loaded) are hanging from the top of garage. On mower chassis, I use "Hutmuttern" (don't know the correct english name) made of brass as contact. There are holes already in front nose for these.
 
Yesterday I did a first test run with RC on grass. It was great to see it moving around. But bumper is still a weak point. If I drive over stone (Terasse), chassis shakes lot and it triggers the bumper switches. If I drive on low grass, it works good but high grass also triggers the bumper.

Conclusion: either it must be less sensitive by adding a smaller bumper trigger part or I need stiffer dampers. But in general, it work.

One drawback Ive observed is blade protection. These parts are very close to ground, to be onest, they are way too close to ground (approx 1cm.) I need to cut a few cm off.
 
Finally I was able to build some sonar mounting points. These small boxes fit to HC-SR04 modules with approx 45x20x15mm dimensions. You need to de-solder pin headers of the module and either solder cables directly to module or rotate the pin header 180 degrees (like I did). Otherwise, modules will not fit.The sonar mount for sides needs to be printed twice where one has to be mirrored.
Because my bumper was too sensitive, I also build a smaller bumper trigger bar. Now chassis has to move more until it triggers.


Nun sind auch die Sonar Sensor Halterungen fertig. Diese sind für HC-SR04 Sensoren mit 45x20x15mm geeignet (Marotronics Shop). Damit die passen, müsst ihr die Stiftleisten auslöten und um 180 gedreht wieder einlöten. Ihr könnt aber auch direkt die Kabel ran löten. Die Halterung für die Seite muss zweimal gedruckt werden, davon einmal gespiegelt.

Ausrichtung auf Druckbett / Orientation on print surface
sonar_front.png

Sonar-side.png


Printable without support
Druckbar ohne Support

IMG_0036.JPG

IMG_0037.JPG

IMG_0038.JPG


Weil der Bumper zu empfindlich war, habe ich einen neuen Bumper Trigger erstellt. Dieser ist kleiner, so dass das Chassis sich weiter verschieben muss, ehe der Bumper auslöst.
Attachment: https://forum.ardumower.de/data/media/kunena/attachments/2946/IMG_0038.JPG/
 
Zuletzt bearbeitet von einem Moderator:
Note for my self:
- mounting plate for PI Zero and Gyro (inner side of PCB Box Lid).
- small lid for OLED space on PCB Box Lid (don't need OLED for myself)
- PCB mounting points needs to be raised for my mower
 
For a moment I thought that I will have a chance to glance at your station implementation. No luck this time :)

One thing that I noticed is that, at least in my case, the bumper is VERY sensitive to the switch pin angle.
In my case, if I bend the metal pin with pliers just a bit (maybe 1-2 mm difference near the end) - it changes sensitivity completely.
 
Charging Station is the next part to solve. In my case, I'm not going to use any cool looking 3D printed charging station like Robin Fröjd provided or jussip is working on, Sorry for this.
The reason is, I already have some king of garage and I'll stick to it because the new mower fits in too. So all I need to do is to bring some charging contact inside and I'm done.

What kind of bumper do you use? Still Hall sensors ore did you switch to micro switches like I did? Hall sensors are way too sensitive and gets affected by so many other things. Have you ever seen how they solved it at Automower? They use a long pin with magnet attached on top. It is mounted in a way that if chassis moves 1mm, the magnet moves much more lets say 3mm). This way, Hall sensor creates a clear, non noisy output.

If you use micro switches, you can set sensitivity not by potentiometer, but you can re-design the trigger part. It is a small 3D printed piece which pushes the switches. Make it larger and your bumper is sensitive, male it smaller and it gets less sensitive.

I had to print some parts until I found a good working setting. If too sensitive, bumper will trigger even when driving inside your house because chassis shakes.
 
I'm planning to use my old garage too. The charging contacts however - is the interesting part.

I use the one with micro switches. And just by bending those metal legs on the switches it is possible to change "sensitivity" quite radically, _without changing_ the trigger part.
 
Als Hinweis zur Front. Gerade im vorderen Bereich geht es recht eng zu. Es passt zwar alles rein, aber dem ein oder anderen mag es zu eng sein.
Auf Thingiverse hat jemand einen Kommentar zu meinem Mower hinterlassen. Er hat die drei Frontteile im Slicer in X Richtug um 10% verlängert und so viel Platz gewonnen. Bilder zu dem Resultat hat er ebenfalls angefügt.

Just as a side note. At front section, there is not much space. I was able to place all sensors here but others might find not enough space (like when using two perimeter coils). At Thingiverse, someone commented my Mower. He used his Slicer to scale the front parts 10% in X direction. This way, he gets up to 40mm more space. all parts still fits to rest of chassis. He also provided some pictures about the results.

https://www.thingiverse.com/thing:3344829/comments/#comment-2440842
 
Moin, moin!

Ich lese bereits eine Weile hier im Forum und werkel fleißig herum :)
Wahnsinn, was Ihr alle hier auf die Beine stellt!

Beim 3D drucken bin ich noch völlig grün hinter den Ohren - habe aber "schon" zwei Teile gedruckt. Dabei habe ich mich einfach auf die Standardeinstellungen von Cura für PLA verlassen.. Ich drucke bei einem Kumpel, der zwar inzwischen einen Drucker, aber auch noch nicht so richtig Plan hat :D

Empfohlenes Filament?
ABS, PP oder PLA? So teuer wie das PLA-Filament ist - wäre das eine gute Wahl? Ungiftiges Plastik hat schon was.. Wann und wo man welches Material benutzen sollte (mechanische Beanspruchung), hab ich noch nicht ganz geblickt :s

Gibt es Empfehlungen zu den Druckeinstellungen? Wandstärke, Füllung etc.?

PS: Sorry, falls ich dafür hier im falschen Topic bin, Paddy! Im 3D sub Bereich sieht es so leer aus.. :D
 
Hallo und Willkommen.

Mit PLA wird es am günstigsten. Ich habe das meiste aus PETG gedruckt. PLA geht eigentlich überall wo es nicht Heiss wird. Ich hätte da nur bei den Mähmotoren bedenken. Kommt aber auf einen Versuch an.

Beide Materialien sind nicht dauerhaft UV beständig. Da wäre ASA besser geeignet. Das ist aber schwieriger zu drucken, ähnlich wie ABS. Stinkt vermutlich auch so. Andere Materialien wie PP werden viel zu teuer. Wenn ich nach ein paar Jahren Teile neu drucken muss weil sie spröde sind hab ich damit kein Problem. Bis dahin werde ich vermutlich eh viele Anpassungen vorgenommen haben.

Im Garten habe ich Teile aus PLA, die sind seit drei Jahren draußen und haben sich nicht verändert. Selbst im Komposter drin hat sich das Testteil in den Jahren nicht verändert. Soviel zur Abbaubarkeit im heimischen Umfeld.

Ich habe alles mit einer 0.4er Noozle gedruckt. Layerhöhe 0,2mm mit 4 Perimeter und 25% Infill. Das reicht eigentlich für alles völlig aus.
 
Oben