New English translation of V1.4 assembly instructions

sustainablestew

New member
I have made an attempt at translating the available German document for the V1.4 mainboard into English. Considering I don't speak German, I had to rely heavily on Google translate and then correct any awkward language by hand afterward. Hopefully the result is useful for other English speakers. Now I can actually start assembling my board....
 

Anhänge

  • Ardumower Mainboard V1.4 Assembly Instruction.pdf
    18,8 MB · Aufrufe: 418
Wow! Thank you for getting it done. I was taking some time to start the assembly because of the lack of English version.

I looked at the file and found out that the Table of Contents was still in German, so I fixed that and I am attaching the new file here.
 

Anhänge

  • Ardumower Mainboard V1.4_r7 Assembly Instruction v1.0.pdf
    19,7 MB · Aufrufe: 308
@sustainablestew @hotchiguy I am getting ready to order this.. thank you for the translation! Question: what happens after page 56? :D :D

Have you guys completed assembly yet?
Have you found a source for the recommended battery in the US?
How do you plan to charge the robot? (Are you going to have a dock?)

Sorry for all the questions - I'm just so happy to find someone who speaks English natively! :)
 
I'm not one of those guys, but I hope it is ok if I answer anyway.
> Have you guys completed assembly yet?
Not yet.
>Have you found a source for the recommended battery in the US?
Got this battery pack. It is too fat to fit in the mower's battery compartment, but it looks like there is enough room to fit it somewhere.
>How do you plan to charge the robot? (Are you going to have a dock?)
I'd love to have a dock, but one thing at a time. I'll be happy when I get it working.
 
Lately I haven't had much time to spend on this project, too much else going on. I hope to have a working mower before next spring and the new mowing season. I am actually trying to build the DIY 3D-printed chassis from Jussi and not the standard configuration. This involves making a 21-cell battery pack yourself (7P3S) and the 3D files for this are available. All was going pretty well with printing parts, a few learning experiences since I haven't worked with high temperature plastics like ASA before, but I hit kind of a show-stopper when I realized that the chassis is designed around the V1.3 PCB. The V1.4 mainboard is just a little bit bigger, enough that it won't fit. I don't have the CAD skills or software to redesign everything accordingly, so I have do some kind of ugly hack to shoehorn it in somehow. This is where I have been stuck for several weeks now, I haven't started soldering the PCB yet since I needed the instructions first.
 

Anhänge

  • IMG_2178_small.JPG
    IMG_2178_small.JPG
    139,7 KB · Aufrufe: 46
  • IMG_2181_small.JPG
    IMG_2181_small.JPG
    221,3 KB · Aufrufe: 49
If you want to undertake the battery pack, it's a bit of a project in and of itself. You'll need to print out 7 of the 3-cell holders (each one has a top and bottom piece), I printed them in clear PETG. Explicit instructions for slicer settings are given and I followed them and didn't have any trouble. I printed the outside case in ASA and had some issues with warpage and heat creep even though I have an enclosure. Printing it in PETG would probably be much easier, although not as heat resistant. You'll also need the nickel cell strips sold by 18650.lt, I ordered their hardware and it all came in perfect, except that shipping from Lithuania takes about 3 weeks and the Lithuania post tracking website isn't in English! Then you'll need 21 high-discharge lithium cells, old cells scavenged from laptops or other electronics aren't really suitable for this due to the motors. Jussi used Samsung 35E cells in his Arctic Hare build, and these are around $7-$8 a cell from suppliers like batteryjunction.com or 18650batterystore.com. Also you'll need a battery management board (about $10) to prevent overcharging and over-discharging and provide cell balancing, I bought one from Ebay suitable for 20A drain for a 7S lithium pack, the description can also be found on Jussi's build page at thingiverse.

It's all perfectly doable if you don't mind undertaking a whole secondary project and learning about lithium cells and packs, but for many people this may be more trouble than they really want to go to. Of course, most people don't consider building their own robotic lawnmower from a kit either, so I suppose you're in the right place....

Links:
18650 battery modules and hardware - https://18650.lt/
STL files and printing instructions for above modules - https://cults3d.com/en/3d-model/gadget/nese-the-no-solder-18650-makita-module
Jussi's Arctic Hare page at thingiverse - https://www.thingiverse.com/thing:3563727

Also note that the Arctic Hare files have their own version of the battery holder case and it doesn't use the "standard" one from 18650.lt. If you're just using this for a normal Ardumower then use the 7S3P "Makita-style" battery case STL file provided with the cell holders.

Edit: if space is a problem there's also a 2P version, which is of course significantly shorter. Using this with the Samsung 35E cells would still give 7000 mAh, instead of the 10500 mAh of the 3P configuration.
 
Zuletzt bearbeitet:
Sorry for all the questions - I'm just so happy to find someone who speaks English natively!
Haha, lots of good questions!

what happens after page 56?
This is a good overview of what it takes to do the full build - https://wiki.ardumower.de/index.php?title=Datei:Ardumower_steps.jpg
Different build instructions - https://wiki.ardumower.de/index.php?title=Hauptseite

I started with soldering PCB, almost done with it at the moment, and next I will be assembling the chassis - https://wiki.ardumower.de/index.php?title=Chassis_2021
Have you found a source for the recommended battery in the US?
I bought this one but haven't tried it yet - https://hobbyking.com/en_us/zippy-compact-5000mah-7s-25c-lipo-pack.html
I just hope it will work for me at least for some time

How do you plan to charge the robot? (Are you going to have a dock?)
Definitely going to build a docking station. I want the robot to be automated as much as possible.
 
If those Infos Help:

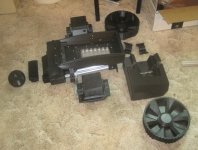
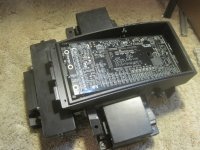
I think the Batterypacks here are made by an Enterprise for Batteryrefurbishing specialized on Ebikes.
They use LiMn Sony Konion Cells. For the Ardumower you want something around 24 Volts. Fully charged not exceeding 30Volts.
Something like that:
https://www.voltronic.de/shop/produ...606_sony-konion-limn-us18650v3--2250mah-.html

But you can take LiFePo Cells aswell!
RC Helicopters have a branch for LiFePo´s... Or something like this is the Dimensions you probably want:
https://www.batteryspace.com/Custom...ery-25.6V-4500-mAh-115Wh-13.5A-rate-3Rx8.aspx

LiMn are used widely in PowerTools like Drills. I think you can contact any Enterprise and ask to make a 7s2p or 7s4p Squarepack out of LiMn Cells.
LiFePo´s are relatively safe for abuse and in that case it should be a 8s Pack. I wouldnt recommend a pure LiIo or LiPo.
The max Outputcurrent of the Pack doesnt matter at all! The Ardumower is using barely 70 Watts under full load with the standard components!

You want to choose something durable.
If you have a Pack slighly over 30Volts, you don´t need to charge fully. And you dont have to drain it fully.
That improves Batterylife by far. The "Go Home" Voltage is adjustable and Charging Stop Voltage in the Standard Hardware Layout too.
But you have too keep in mind not charging over a certain current, becouse it´s going through the board.

I am using a ~240Wh Batterypack and it´s going easily!! 7.5 hours.

In Case of the translations. If there are any problems i think it´s perfectly fine to ask for specific translations in the forum.
If it´s not the "all in one translation", feel free to contact me i´ll see to help you out!
 
Zuletzt bearbeitet:
I downloaded the English 1.4 instructions(thank you everyone for all your hard work) but the first thing I run into is no motor driver components as shown. However, I do have a motor driver Adapter and the pins line up perfectly. I went ahead and soldered that in(or the pins for it) and went on to the next step, the connections terminals. My kit was short the proper number of those terminals(fourth time this has happened). Previously I was able to find more parts but those 2-pin terminals seem not to be available. Anyone had this problem in the US? Thank you.
 
I downloaded the English 1.4 instructions(thank you everyone for all your hard work) but the first thing I run into is no motor driver components as shown. However, I do have a motor driver Adapter and the pins line up perfectly. I went ahead and soldered that in(or the pins for it) and went on to the next step, the connections terminals. My kit was short the proper number of those terminals(fourth time this has happened). Previously I was able to find more parts but those 2-pin terminals seem not to be available. Anyone had this problem in the US? Thank you.
Did you find what you needed?

I just started my project and cannot find the fuse holders for the first step! argh. Does someone see them in this picture that I am perhaps missing?
 

Anhänge

  • IMG_3098 copy.jpg
    IMG_3098 copy.jpg
    1,3 MB · Aufrufe: 30
Yes I know, on step 6 there is descripe the SMD fuse holder. But the fuse holder is not in the package, why the fuses are soldered on the mainboard. Look on your mainboard you find the fuses are soldered in. You can go to step 7. I will speak with the ardumower team, to change the description of step 6.
 
You are welcome. I was last year also on searching for the fuse holder...and I found only the fuses which was soldered directly on the board...
 
The parts list says:
Matching connection blocks for battery, charger and motors (2x6p, 4x2p)
but I only have 1x6p, 3x2p (see my posted photo a few posts up). Do I need to obtain the missing items, or are they unnecessary? Thanks
 
Oben