Du verwendest einen veralteten Browser. Es ist möglich, dass diese oder andere Websites nicht korrekt angezeigt werden.
Du solltest ein Upgrade durchführen oder einen alternativen Browser verwenden.
Du solltest ein Upgrade durchführen oder einen alternativen Browser verwenden.
Ardumower zum laufen bringen Teil 1
- Ersteller MarioFFK
- Erstellt am


senil
Active member
Hallo,
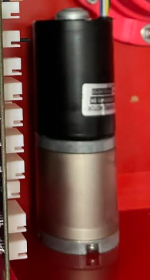
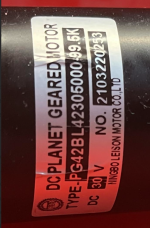
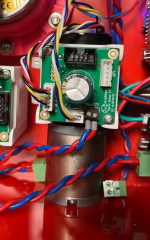
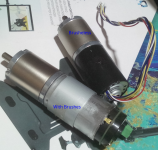
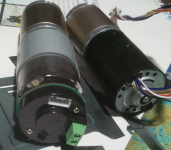
Ich gebe Ihnen die beiden Motoren, die ich habe. Im Bild oben sehe ich, dass Sie bürstenlose Treiber haben, Sie sollten sich also für Motoren wie den auf dem Bild entscheiden, das ich Ihnen zeige.
Leider hat Marotronics die Aufkleber mit den Motor- und Modellangaben entfernt, daher kann ich dir nicht sagen, ob sie identisch sind. Aber ich glaube nicht, dass sie unterschiedlich sind.
Vielleicht könnte jemand die Datei config.h ändern und den Verweis auf Marotronics hinzufügen oder entfernen und versuchen zu klären, welcher Motortyp welcher Zeile entspricht.
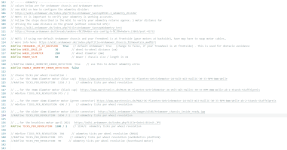
Sie sollten die folgenden Zeilen auskommentieren:
Ich verwende Brushless nicht aufgrund von Treiberproblemen, aber ich habe diese beiden Optionen verwendet, als sie für mich funktionierten.
Ich bin kein Experte. Wenn jemand mehr weiß, kann er mich gern korrigieren.
Viel Glück.
Ich gebe Ihnen die beiden Motoren, die ich habe. Im Bild oben sehe ich, dass Sie bürstenlose Treiber haben, Sie sollten sich also für Motoren wie den auf dem Bild entscheiden, das ich Ihnen zeige.
Leider hat Marotronics die Aufkleber mit den Motor- und Modellangaben entfernt, daher kann ich dir nicht sagen, ob sie identisch sind. Aber ich glaube nicht, dass sie unterschiedlich sind.
Vielleicht könnte jemand die Datei config.h ändern und den Verweis auf Marotronics hinzufügen oder entfernen und versuchen zu klären, welcher Motortyp welcher Zeile entspricht.
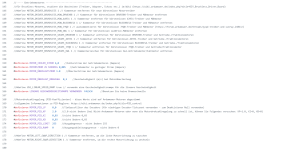
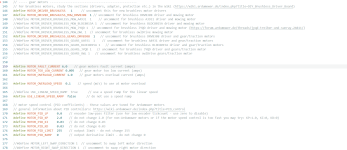
Sie sollten die folgenden Zeilen auskommentieren:
//#define TICKS_PER_REVOLUTION 1050 / 2 // odometry ticks per wheel revolution
#define TICKS_PER_REVOLUTION 1300 / 2 // 1194/2 odometry ticks per wheel revolution
....
// ----- gear motors --------------------------------------------------
// for brushless motors, study the sections (drivers, adapter, protection etc.) in the Wiki (https://wiki.ardumower.de/index.php?title=DIY_Brushless_Driver_Board)
#define MOTOR_DRIVER_BRUSHLESS 1 // uncomment this for new brushless motor drivers
...
#define MOTOR_DRIVER_BRUSHLESS_MOW_DRV8308 1 // uncomment for brushless DRV8308 driver and mowing motor
#define MOTOR_DRIVER_BRUSHLESS_GEARS_DRV8308 1 // uncomment for brushless DRV8308 driver and gear/traction motors
Ich verwende Brushless nicht aufgrund von Treiberproblemen, aber ich habe diese beiden Optionen verwendet, als sie für mich funktionierten.
Ich bin kein Experte. Wenn jemand mehr weiß, kann er mich gern korrigieren.
Viel Glück.

MarioFFK
Member
leider war die Freude nur ein Tag heute geht's wieder nicht die Verbindung. Was aber geht ist die Verbindung mit Bluetooth.Glückwunsch! Du kannst den Batteriestand ablesen, also bist du drauf. Wenn du den Mäher auf eine Unterlage stellst, dass die Räder in der Luft hängen und frei drehen können, kannst du ihn mit dem Kreis rechts oben schon einmal "fahren" lassen.
Kennt das einer geänder habe ich ja nichts.
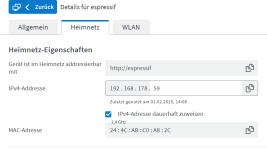
Wie oder wo hast du die feste IP zugewiesen?Ich habe den jetzt eine feste IP zugewiesen und GW und DNS Einträge auch per hand
Wenn die Verbindung einmal geklappt hat, kann ja nur wieder etwas verstellt sein, evtl. in der App?

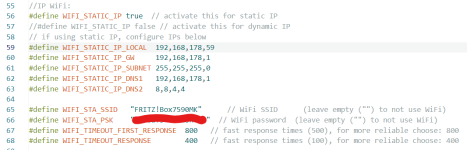

IF YOU USE ESP32:Also im Code vom Grand Central M4 sieht es so aus.
Ich denke, dass dieser Abschnitt und nur dieser Abschnitt relevant für die Verbindung ist.
Anhang anzeigen 7782
Im code vom ESP32 sieht es so aus:
hier habe ich die IP festgelegt und kein DHCP genommen (Das meinte ich damit)
Anhang anzeigen 7783
For wifi , you need to adjust data into config.h FOR ESP32 into esp32_ble
So don't change data into sunray config.h
Hallo @MarioFFK, nimm mal die static-IP in der ESP-config heraus und stelle wieder auf DHCP um. Dann machst du die Einstellung in deiner Fritzbox. Dort kannst du doch einstellen, dass einem Gerät immer die gleiche IP zugewiesen wird.
In der sunray-config.h brauchst du die SSID und das Passwort nicht noch einmal eintragen. Und natürlich nicht vergessen, nach jeder Änderung der config.h sowohl bei ESP32 als auch in sunray, neu zu flashen!
In der sunray-config.h brauchst du die SSID und das Passwort nicht noch einmal eintragen. Und natürlich nicht vergessen, nach jeder Änderung der config.h sowohl bei ESP32 als auch in sunray, neu zu flashen!
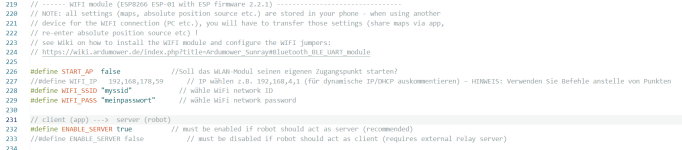
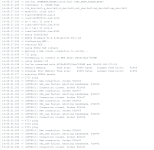
In der sunray-config SSID und passwd ganz wegnehmen:
und zeig mir mal deine ganze ESP-config.h. Hast du das alles berücksichtigt?
#define START_AP  false               // should WIFI module start its own access point?
#define WIFI_IP   192,168,2,15      // choose IP e.g. 192,168,4,1  (comment out for dynamic IP/DHCP) - NOTE: use commans instead of points
#define WIFI_SSID ""                  // choose WiFi network ID
#define WIFI_PASS ""                  // choose WiFi network password
und zeig mir mal deine ganze ESP-config.h. Hast du das alles berücksichtigt?
  Steps to install ESP32 for Arduino IDE 1.8.13:
     1. Arduino IDE: File->Preferences:  Add to board manager URLs: ",https://dl.espressif.com/dl/package_esp32_index.json"
     2. Choose "Tools->Board->Boards Manager"
     3. Add board "esp32" (IMPORTANT!!! choose v1.0.4, latest v1.0.6 does not seem to connect to WiFi access point! )
     4. Choose Board "ESP32 Dev Module"  (if upload does not work: PRESS EN+BOOT, release EN  on your ESP32)
     5. Choose Partition Scheme "Minimal SPIFFS"  (otherwise you may get 'memory space errors' in the Arduino IDE)
    (also see: https://github.com/espressif/arduino-esp32/blob/master/docs/arduino-ide/boards_manager.md )
     6. Choose Port (Windows NOTE: if the port is not shown you may have to install drivers: https://www.silabs.com/developers/usb-to-uart-bridge-vcp-drivers)
     7. Choose "Tools->Manager Libraries..."
     8. Add library "ESP32_HTTPS_Server 1.0.0 by Frank Hessel"
     9. Add library "ArduinoJson 6.18.5 by Benoit Blanchon" and "ThingsOfValue SDK for Arduino 1.0.0 by Kyuseok Oh" (only required if activated 'USE_MQTT')
     10. Add library "NimBLE-Arduino 1.3.1 by h2zero"  (requires less memory - only required if activated 'USE_NIM_BLE')
     11. Copy this file into 'config.h'
     12. Configure the options below and finally compile and upload this project.
