Ardumower 2.0 chassis from the 3D printer

raess

Member
So, Recently, I was asked to design a concept chassis for the Ardumower and the aim of this concept was the ability to print the entire chassis in a 20x20x20 3D printer.
The design is about 90% complete + revision after the first completed chassis has been printed.

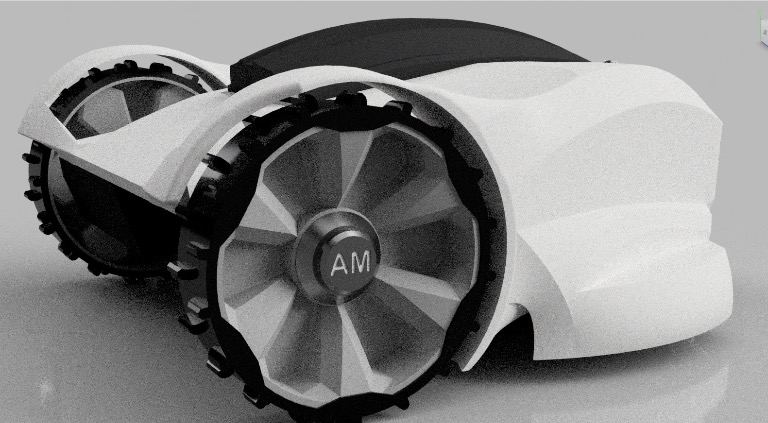
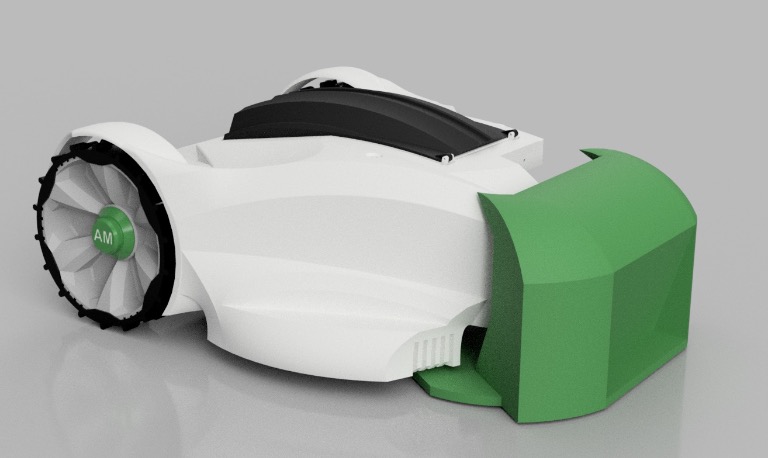
So here is some concept photos of the chassis:
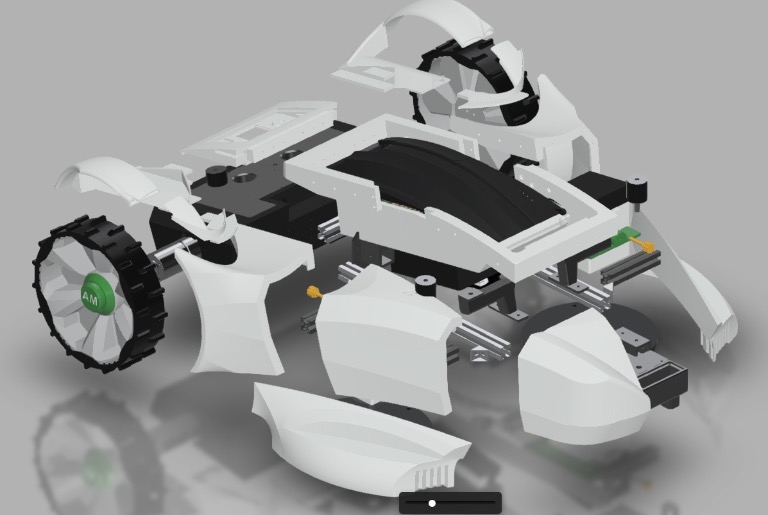
wheel_cap.jpg


exploded view:
explode.jpg


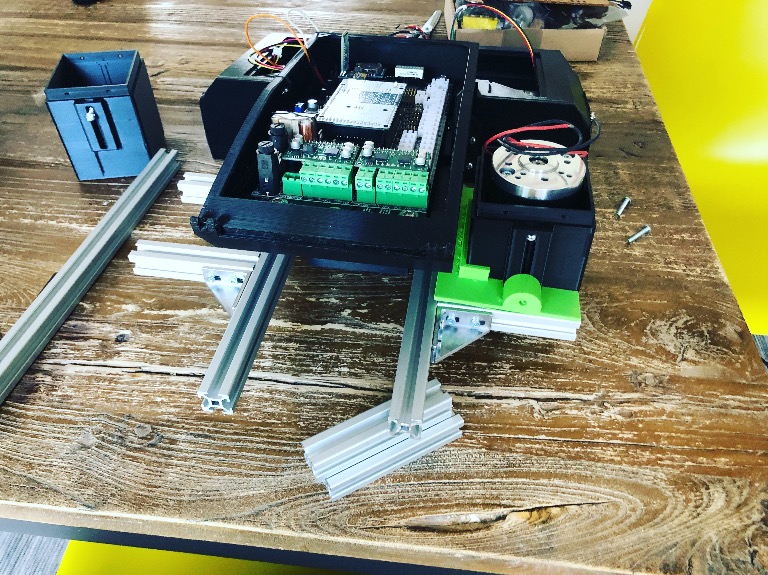
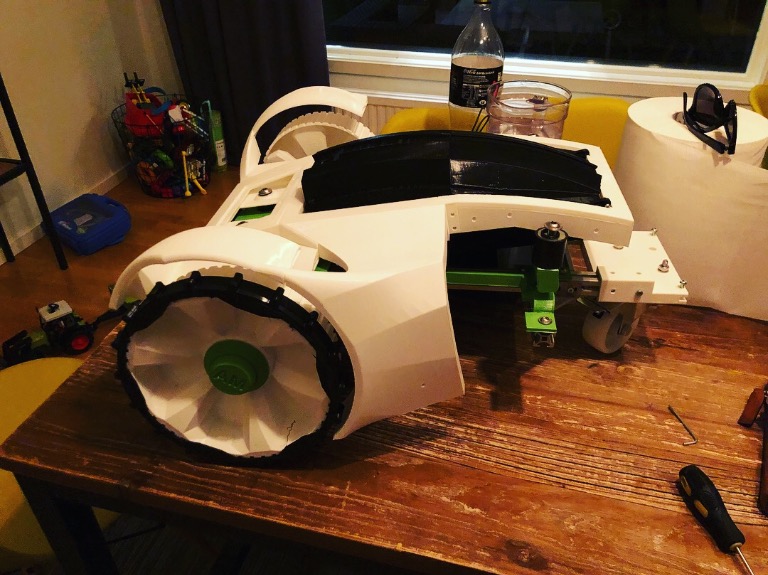
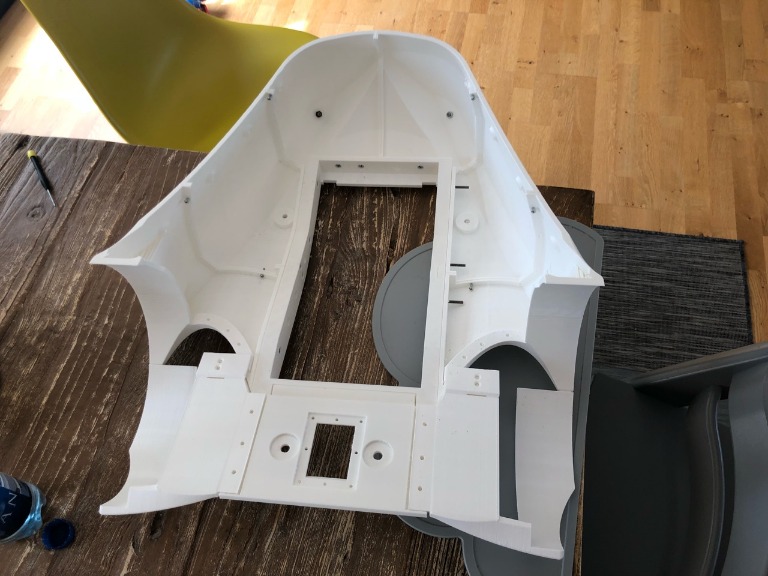
Some images from current status of the construction:
IMG_4157.jpg
 
A big thank you to Robin.
I was very happy when he agreed to the development.
And a big thank you to the many buyers who supported the project with a donation.
So the Ardumower project could support Robin with the necessary hardware.
The chassis is optimized for the Ardumower hardware. All components from the 1.0 chassis fit into the new chassis. (PCB, motors ...)
 
looking good!
Is the CAD-program open source?
I am missing the eyes (sonar). For my SheepSheep in my environment they are essential.
@Markus: any plans on production 3d-printer farm?

Gruess
Chris
 
@Holoratte I am using Autodesk Fusion360.
I will add two holes for the sonor on the front. it will be cut out holes, since does things are not waterproof. ;)

Cheers
 
Holoratte schrieb:
@Markus: any plans on production 3d-printer farm?
Gruess
Chris
I have 3 printers here, but still need some modification.
Then I want to test what 3 printers in Nonstop operation per week so Produce.
Many of the DIY people already have a printer and will print it themselves.
 
Zuletzt bearbeitet von einem Moderator:
Wow, looks great. Means mower drives with the one wheel in front direction?
As I'm working also with fusion360...is the project closed or open?
Michael
 
@micserver
Thx! At the moment the Fusion360 project will remain closed. I will share the STL files of the parts I am happy with. I need to complete the assembly and do some revisions and then I will publish the Fusion360 source. Hope that´s allright!

Cheers
 
micserver schrieb:
Wow, looks great. Means mower drives with the one wheel in front direction?
yes
PS He has two mower discs, in the battery compartment also fit two batteries
 
Zuletzt bearbeitet von einem Moderator:
Wow, good job! Very nice. I'm just curious how weather-proofed such printed parts are? Do you have any experience? How ist the weight compared to the chassis 1.0? I see two mow motors, so it seems to be lightweighted, isn't it?
 
Thanks! weather-proofed should not be a problem. I Print the first Prototype with what I had at home (which is PLA). Later on when I am happy with the design I will print with ASA+. which has UV and water resistance, thermal stability and improved chemical resistance. I will also coat all parts and paint them later on.

For water-proofing parts joints there are some diffrent alternatives Glue, gaskets, melting them together (using a solder iron) etc..
I havent checked the total weight of the robot. But Yes one can have one or two mower motors. The rest of the HW is more or less the same as the 1.0 chassis.


Cheers.
RF
 
Many thanks for all your work here. As I told you already on facebook, I really like your design and want to print one during winter season.
One thing I'm still curious about is the wheel protections of rear wheels. I don't know if "wheel arch" is the right word for this.

I'm wondering if it is strong enought. On my commercial chassis, they has broken after few hours caused by children's playground. The construction of the childrens swing looks like an huge "A", something like this https://www.woodinis-spielplatz.de/kinder-doppelschaukel-mit-kletterpodest-und-rutsche.html
Sometimes, the mower hits the swing in such an angle, that only the wheel-arch hits the swing. In this case, no bumper gets triggered and the mower keeps moving forward until motor current sensor triggers to stop. Each time this occurs, a small piece of chassis breaks. So I added some aluminium strips to harden the wheel arch.

Patrick
 
Hi,

might you share some specs about the dimensions (WxHxL)? I'm wondering if it fill fit into my current garade or if I must change it too.
As I see, you published some files on thingiverse (upper cover part only?) so it would be glad if you could provide some print details.

- How many filament should we order (approx.)?
- Do we need support structures (it seems so)
- any recommendation about layer height, perimeter, infill, nozzle diameter?

Patrick
 
Hi.
Again congratulation for this enormous work.
I have not see the receiver coil for perimeter location (take care that you need to put them at max distance from motor and PCB).
Maybe a screen can be usefull ?
Thanks and good luck.
 
Oben