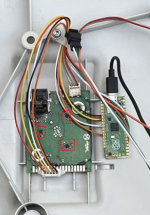
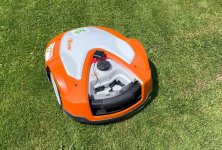
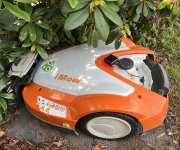
Mit unserem owlKit ist auch der Umbau des iMow 632 eine einfache Sache und in ein paar Stunden erledigt.
Zugegeben, ich habe 3 Tage gebraucht, weil wir die Motoren noch nicht kannten und ich die passende Einstellung finden musste. Auch wollte ich unbedingt die Bumper Technik übernehmen, um da nichts selbst zu basteln. Aber jetzt kennen wir die Technik.
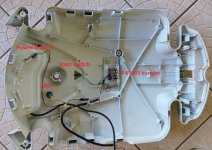
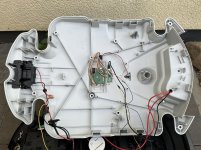
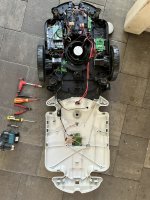
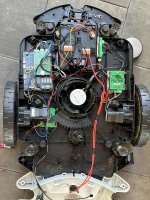
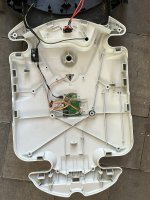
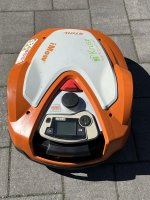
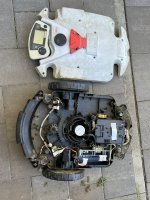
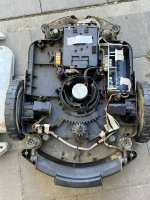
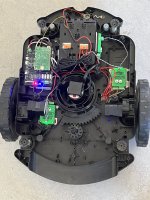
Hier mal die ersten Fotos vom Umbau, bevor der Mäher jetzt in den Testbetrieb geht.
Mein erster Eindruck, der iMow hat eine hochwertige und Robuste Motortechnik und macht da einen besseren Eindruck als z.B. der Husqvarna 220 oder 265.
Aber vom Gehäuse her ist der iMow etwas „labberich“ und hat nach unten einige Löcker, vermutlich da wo sich Schwitzwasser sammelt. Auch die Ladekontakte liegen im Gehäuse. Dadurch kommt einiges an feinem Staub in die Technik.
Das ist beim Husqvarna deutlich besser, der ist 100% abgedichtet und ist Staub und Wasserdicht.
Ich habe die Löcher im iMow mit Filterflies abgedichtet, so kann Wasser raus und der Staub bleibt draußen. Mal sehen, wie das klappt.
Natürlich berichte ich wie sich der Mäher in der Praxis schlägt und auch der Umbau wird noch dokumentiert, zum Nachbauen.
With our owlKit, the conversion of the iMow 632 is also a simple matter and can be done in a few hours. Admittedly, it took me 3 days because we didn't know the engines yet and I had to find the right setting. I also really wanted to adopt the bumper technique so that I wouldn't make anything myself. But now we know the technology.Here are the first photos of the conversion before the mower goes into test operation. My first impression, the iMow has a high-quality and robust engine technology and makes a better impression than e.g. the Husqvarna 220 or 265.But from the housing the iMow is a bit "labberich" and has some bumps downwards, probably where condensation collects. The charging contacts are also located in the case. This brings a lot of fine dust into the technology.This is much better with the Husqvarna, which is 100% sealed and is dust and waterproof. I sealed the holes in the iMow with filter fleece, so water can get out and the dust stays out. Let's see how that works. Of course, I report on how the mower performs in practice and the conversion is also still documented, for reconstruction.
Zugegeben, ich habe 3 Tage gebraucht, weil wir die Motoren noch nicht kannten und ich die passende Einstellung finden musste. Auch wollte ich unbedingt die Bumper Technik übernehmen, um da nichts selbst zu basteln. Aber jetzt kennen wir die Technik.
Hier mal die ersten Fotos vom Umbau, bevor der Mäher jetzt in den Testbetrieb geht.
Mein erster Eindruck, der iMow hat eine hochwertige und Robuste Motortechnik und macht da einen besseren Eindruck als z.B. der Husqvarna 220 oder 265.
Aber vom Gehäuse her ist der iMow etwas „labberich“ und hat nach unten einige Löcker, vermutlich da wo sich Schwitzwasser sammelt. Auch die Ladekontakte liegen im Gehäuse. Dadurch kommt einiges an feinem Staub in die Technik.
Das ist beim Husqvarna deutlich besser, der ist 100% abgedichtet und ist Staub und Wasserdicht.
Ich habe die Löcher im iMow mit Filterflies abgedichtet, so kann Wasser raus und der Staub bleibt draußen. Mal sehen, wie das klappt.
Natürlich berichte ich wie sich der Mäher in der Praxis schlägt und auch der Umbau wird noch dokumentiert, zum Nachbauen.
With our owlKit, the conversion of the iMow 632 is also a simple matter and can be done in a few hours. Admittedly, it took me 3 days because we didn't know the engines yet and I had to find the right setting. I also really wanted to adopt the bumper technique so that I wouldn't make anything myself. But now we know the technology.Here are the first photos of the conversion before the mower goes into test operation. My first impression, the iMow has a high-quality and robust engine technology and makes a better impression than e.g. the Husqvarna 220 or 265.But from the housing the iMow is a bit "labberich" and has some bumps downwards, probably where condensation collects. The charging contacts are also located in the case. This brings a lot of fine dust into the technology.This is much better with the Husqvarna, which is 100% sealed and is dust and waterproof. I sealed the holes in the iMow with filter fleece, so water can get out and the dust stays out. Let's see how that works. Of course, I report on how the mower performs in practice and the conversion is also still documented, for reconstruction.
Zuletzt bearbeitet: