Following is an example on how to mount on the mower motor small encoders bougth in the shop:
https://www.marotronics.de/Magnetic-Encoder-Pair-Kit-for-Micro-Metal-Gearmotors-12-CPR-27-18V
This allows speed regulation for a better cut, otherwise the speed may vary, depending on grass thickness or density.
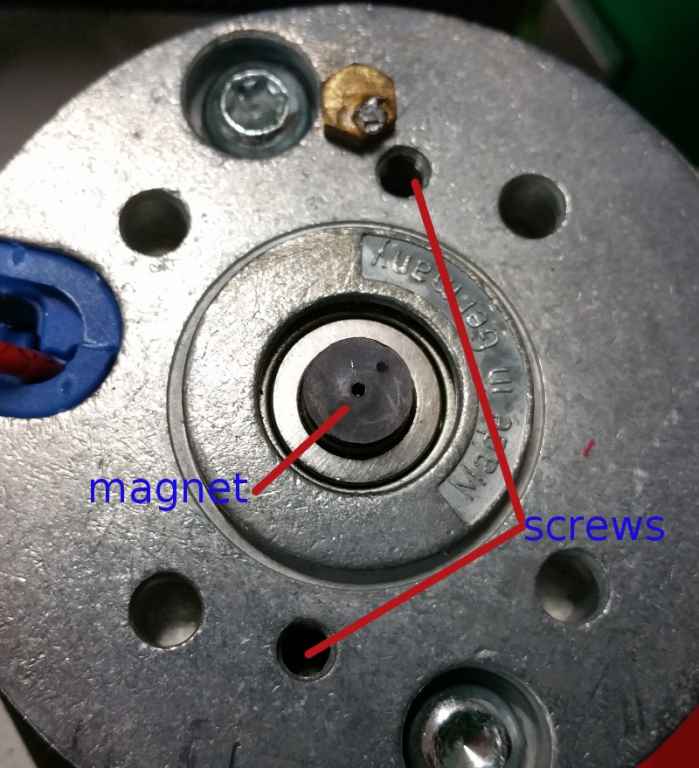
The small magnet is just the same size as the motor axis, so i glue it on the end of the axis with cyanoacrylate (super glue) after careful cleaning and degreasing. Beware not to let any solvant or glue inside the bearing :blink: . Try to get it well centered.
I also welded a 4 set pins on the small board. As the holes do not have the standard 1/10" width, the pins must be slightly bent to fit inside the holes. The 2 remaining holes are not needed for our purpose.
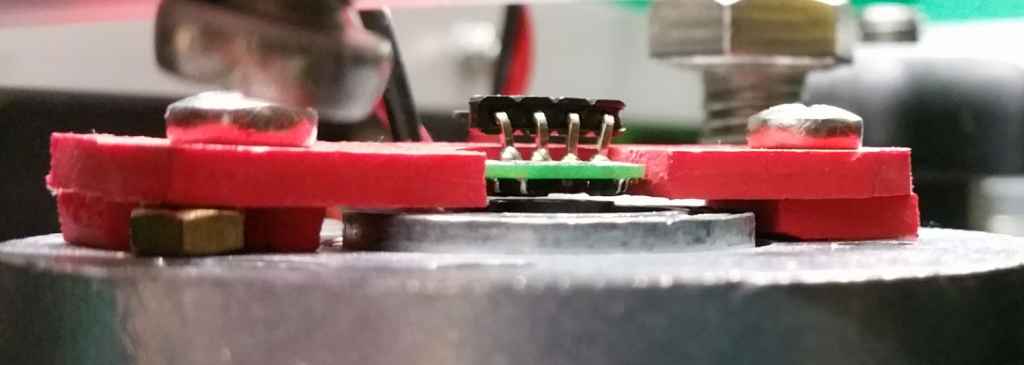
Then I cut a hole narrowly the size of the board in a piece of 3 mm thick pvc so the board is tightly hold. Then I fixed it with hot glue.

The set is then fixed on the motor with 2 screws, Once again it has to be well centered above the magnet.
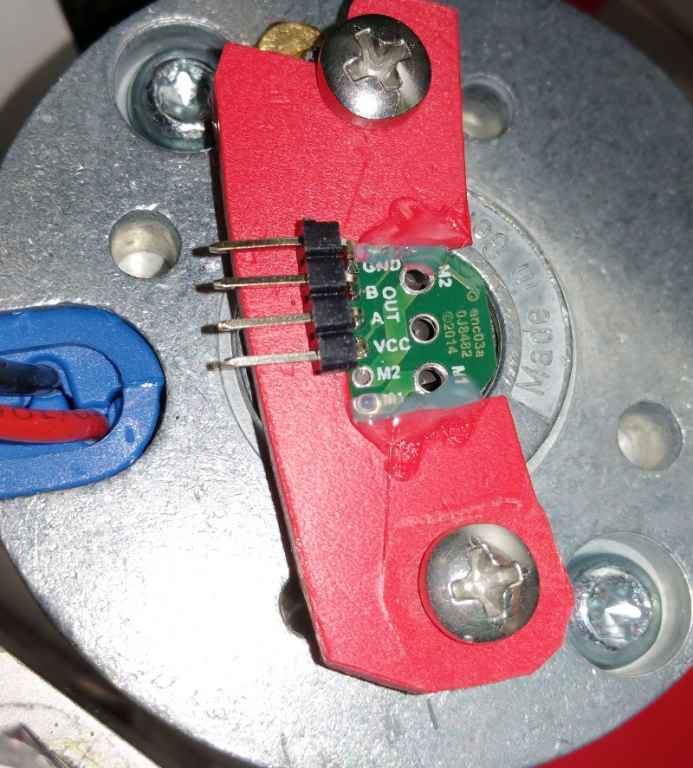
It can be plug directly on the pcb and works well. Do not forget to activate the pullup input in the software.
Ticks per revolution is 3. The 12 annouced in the product presentation are counted with 2 encoders (quadrature) and rising and falling edges, so 3 x 2 x 2 = 12 !
Hope it help B)
https://www.marotronics.de/Magnetic-Encoder-Pair-Kit-for-Micro-Metal-Gearmotors-12-CPR-27-18V
This allows speed regulation for a better cut, otherwise the speed may vary, depending on grass thickness or density.
The small magnet is just the same size as the motor axis, so i glue it on the end of the axis with cyanoacrylate (super glue) after careful cleaning and degreasing. Beware not to let any solvant or glue inside the bearing :blink: . Try to get it well centered.
I also welded a 4 set pins on the small board. As the holes do not have the standard 1/10" width, the pins must be slightly bent to fit inside the holes. The 2 remaining holes are not needed for our purpose.
Then I cut a hole narrowly the size of the board in a piece of 3 mm thick pvc so the board is tightly hold. Then I fixed it with hot glue.
The set is then fixed on the motor with 2 screws, Once again it has to be well centered above the magnet.
It can be plug directly on the pcb and works well. Do not forget to activate the pullup input in the software.
Ticks per revolution is 3. The 12 annouced in the product presentation are counted with 2 encoders (quadrature) and rising and falling edges, so 3 x 2 x 2 = 12 !
Hope it help B)
")